As I mentioned in a previous (ABC Nursery Window) post, I have a thing for old windows. I could have a thousand of them and still drag “just one more” home. Every.single.time. There’s always potential for a fun DIY window project, ya know? They’re the openings between your cozy, comfortable home and the great beyond, so to me they’re a tad magical. When they’re yanked out of a home in the name of home renovations, I feel the need to rescue and (eventually) upcycle them.
Supplies you’ll need:
Paper Riot Co. Floral Wreath Dimensional Wall Decals
Paper Riot Co. Woodsy Christmas Wall Decals
An old window
Window cleaner & paper towels
Optional: Sandpaper, paint, paint brush & sealer
Step 1: Choose & clean the perfect window (scroll down for tips on selecting just the right one).
After you’ve chosen your fave, give it a good, thorough cleaning.
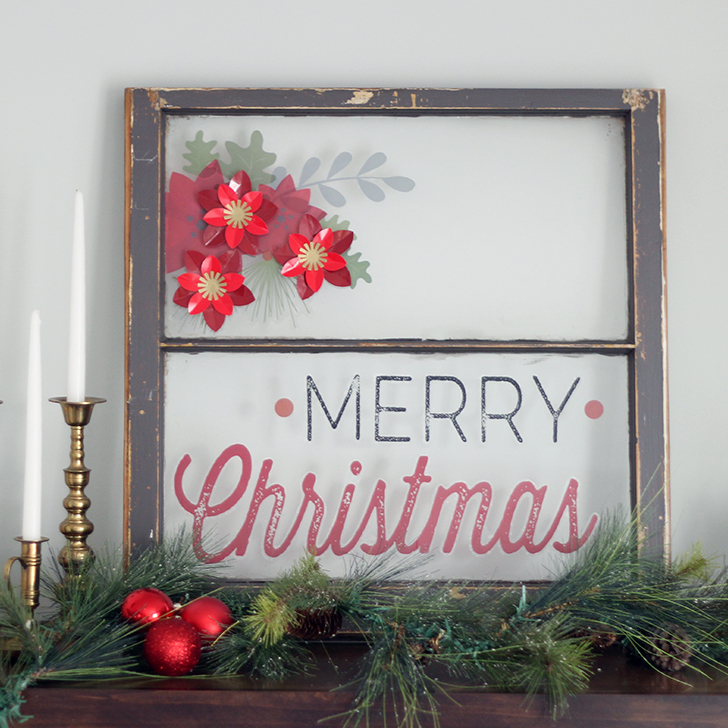
Step 2: Trim decals away from backing and lay onto window for placement.
You’ll note that we trimmed one decal (large red flower) along one edge to give the appearance the decals were running off the edge of the window.
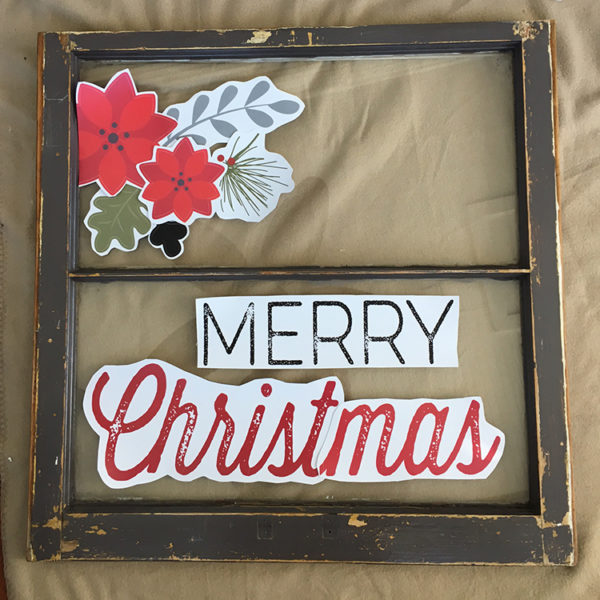
After you’re satisfied with placement, Begin removing backing and adhering decals to window. Should something be adhered not quite where you’d like – no sweat. Gently peel off window and replace.
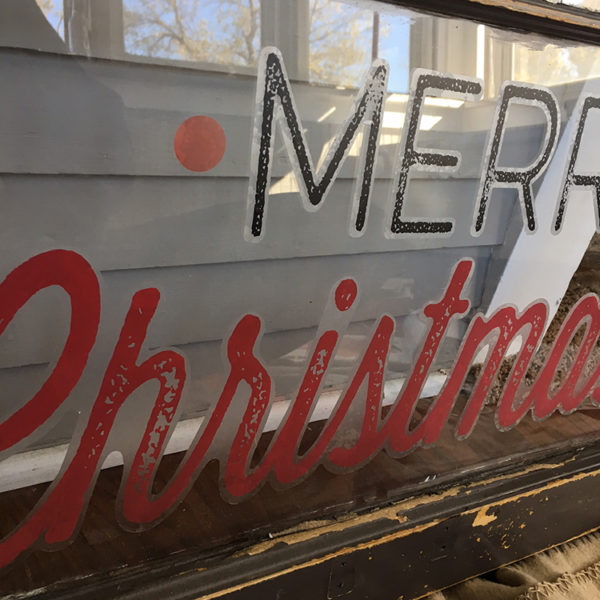
Step 3: Smooth out any air bubbles.
Should you notice any air bubbles, gently run the straight edge of a credit card over the surface of the decal until bubbles are gone.
Step 4: Add dimensional decals to finish.
Peel backing from dimensional flowers, then adhere to window as shown in final project.
Step 5: Place window on display for all to see.
Prop window up on your mantel, front porch or anywhere guests will see it front & center. It’ll be the star of your holiday show.
Tips for finding & prepping an old window, as shared in previous post (linked above):
If you find a window in great shape, simply clean the glass and add decals. We were lucky with this one, as that’s all we needed to do. Should you decide that you’d like to update the color of your window or it’s in dire need of a fresh coat of paint, it’s easy! Just lightly sand, paint and seal (we recommend Minwax Polycrylic Sealer or Rustoleum Topcoat) prior to adding decals to the glass. Easy peezy!
 Before you plunk your money down, you’ll definitely want to follow these tips for inspecting windows to make sure you’re getting the most bang for your buck (and to insure that your window won’t self-destruct later):
- Be sure there are no cracks or chips in the glass.
- Be sure the glass is firmly secured (by either metal clips or caulking) to the pane. Note: If you’re ambitious, you can remove the clips or caulking and redo those yourself, but I prefer to purchase them when they’re already in great shape.
- Be sure there are no rotting areas on the wood. This can cause you some big headaches down the road. The window could fall apart, shift or just crumble.
- As you’re choosing your window, consider the size and shape of the glass openings. If you have a specific project in mind, you’ll want to be sure the design you’ll be adding will sit nicely in the openings.
Happy DIY’ing, and get your riot on!