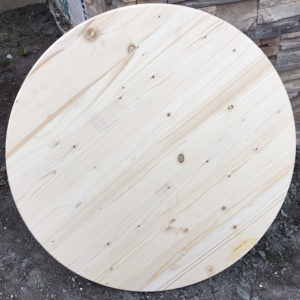
 My most favorite thing on earth to do is find old bits of this or that which are in dire need of rescue. Things like old chairs, barn wood, etc. Occasionally, though, I run across something brand spankin’ new that clearly needs to come home with me. Take this totally fab wood circle. Talk about a blank space for a sweet DIY project, yes? I discovered it at Menard’s one day while browsing. Somehow it magically landed in my cart.
Supplies you’ll need:
Paper Riot Co Bright Bulbs Wall Decals
Circular wood sign base (we used Master craft Edge Glued Round Panel from Menard’s)
Rustoleum Black Chalkboard Spray Paint (you can also choose to use the brush/roll-on kind)
Optional: sandpaper (we recommend 220 grit)
 Step 1: First, you’ll prepare the wood base for painting.
Although the sign base we had chosen was pre-sanded and smooth, we gave it one more sanding to ensure total smoothness (this will help with decal stickability). After brushing any excess dust away, set the base up on a table or other freestanding object so you can spray along all edges easily.
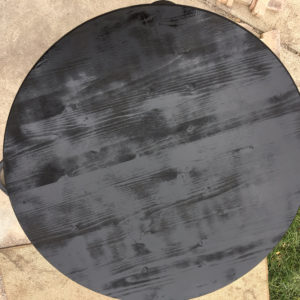
Step 2: Next, you’ll paint the wood base.
We gave our wood base two coats, allowing it to dry thoroughly between each coat. You may notice (as you’ll notice on our project shown right) that the paint looks extremely wonky after application. No worries – it’ll look marvelous once it’s dry. We promise.
Step 3: Next, you’ll apply the decals.
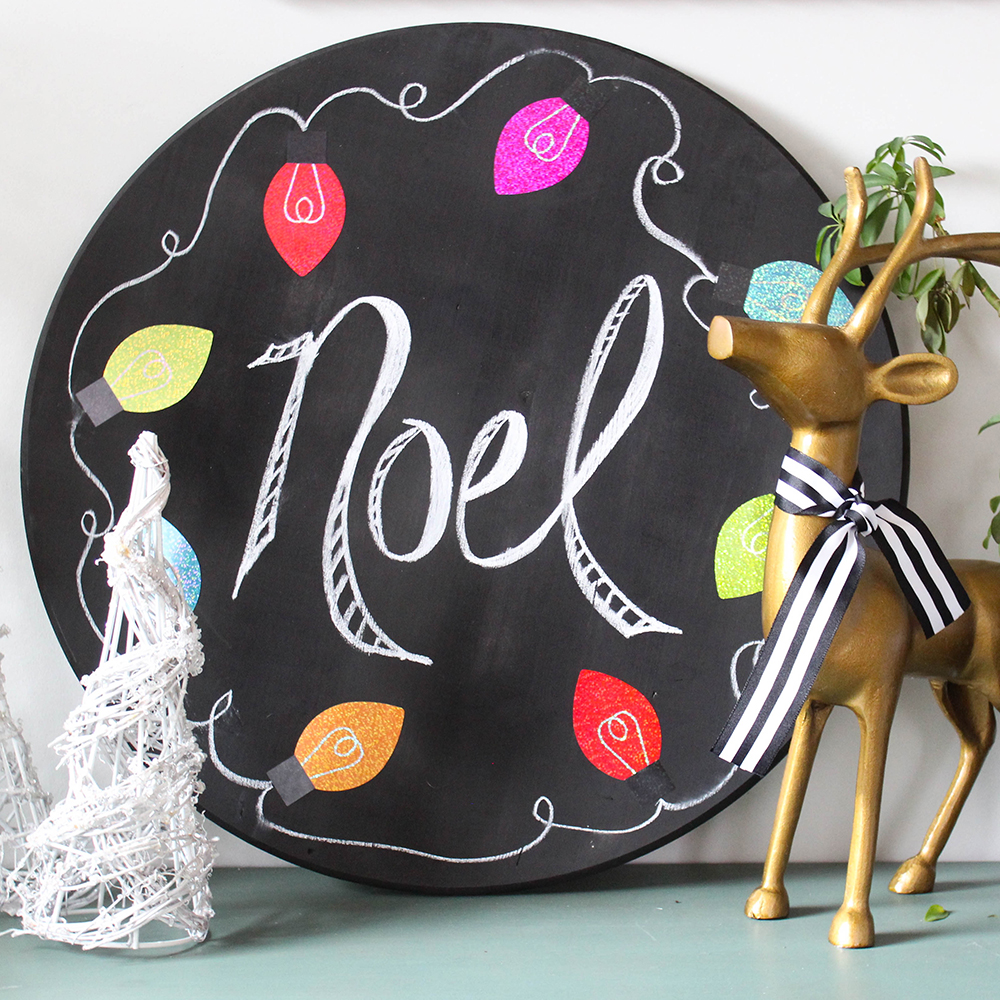
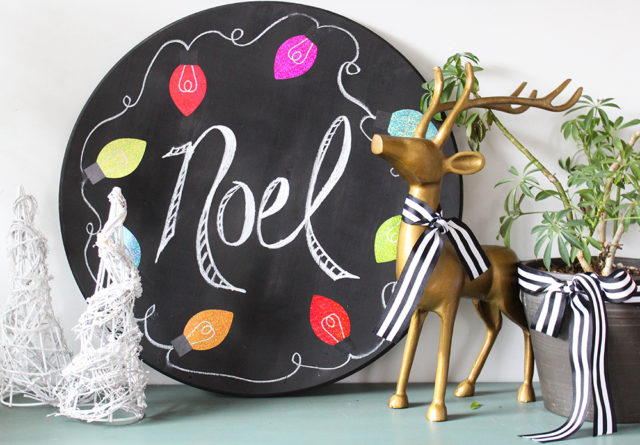
Gently peel decals from backing, then place around sign as shown. You simply can’t do this part wrong, so line them up any which way you like.
Step 4: Next, you’ll add chalk doodles.
Draw light string, connecting bulbs as shown. Doodle “Noel” or any phrase you like in the center. If you’re stumped on a design for the center, simply visit Pinterest and search for “holiday chalkboard doodles”. You’ll find oodles of doodle ideas.
Step 5: Lastly, you’ll place this beauty in its spot for the holiday season.
Be sure to prop it up in a well-traveled area. Everyone is going to want to gawk at it.
One of the best parts of this project? After the holiday season is over, you can simply peel the decals off and erase the chalk to “clean the slate” for a whole new project design! PLEASE NOTE: Due to the nature of chalkboard paint, once decals have been applied to a chalkboard painted surface and then removed, they will need to be discarded. The chalkboard paint does stick to the decals rendering them not available for reapplication later.
Look for this sweet chalkboard circle to be repurposed in future projects. We’ve definitely got ideas.
Happy decorating, and Get Your Riot On!