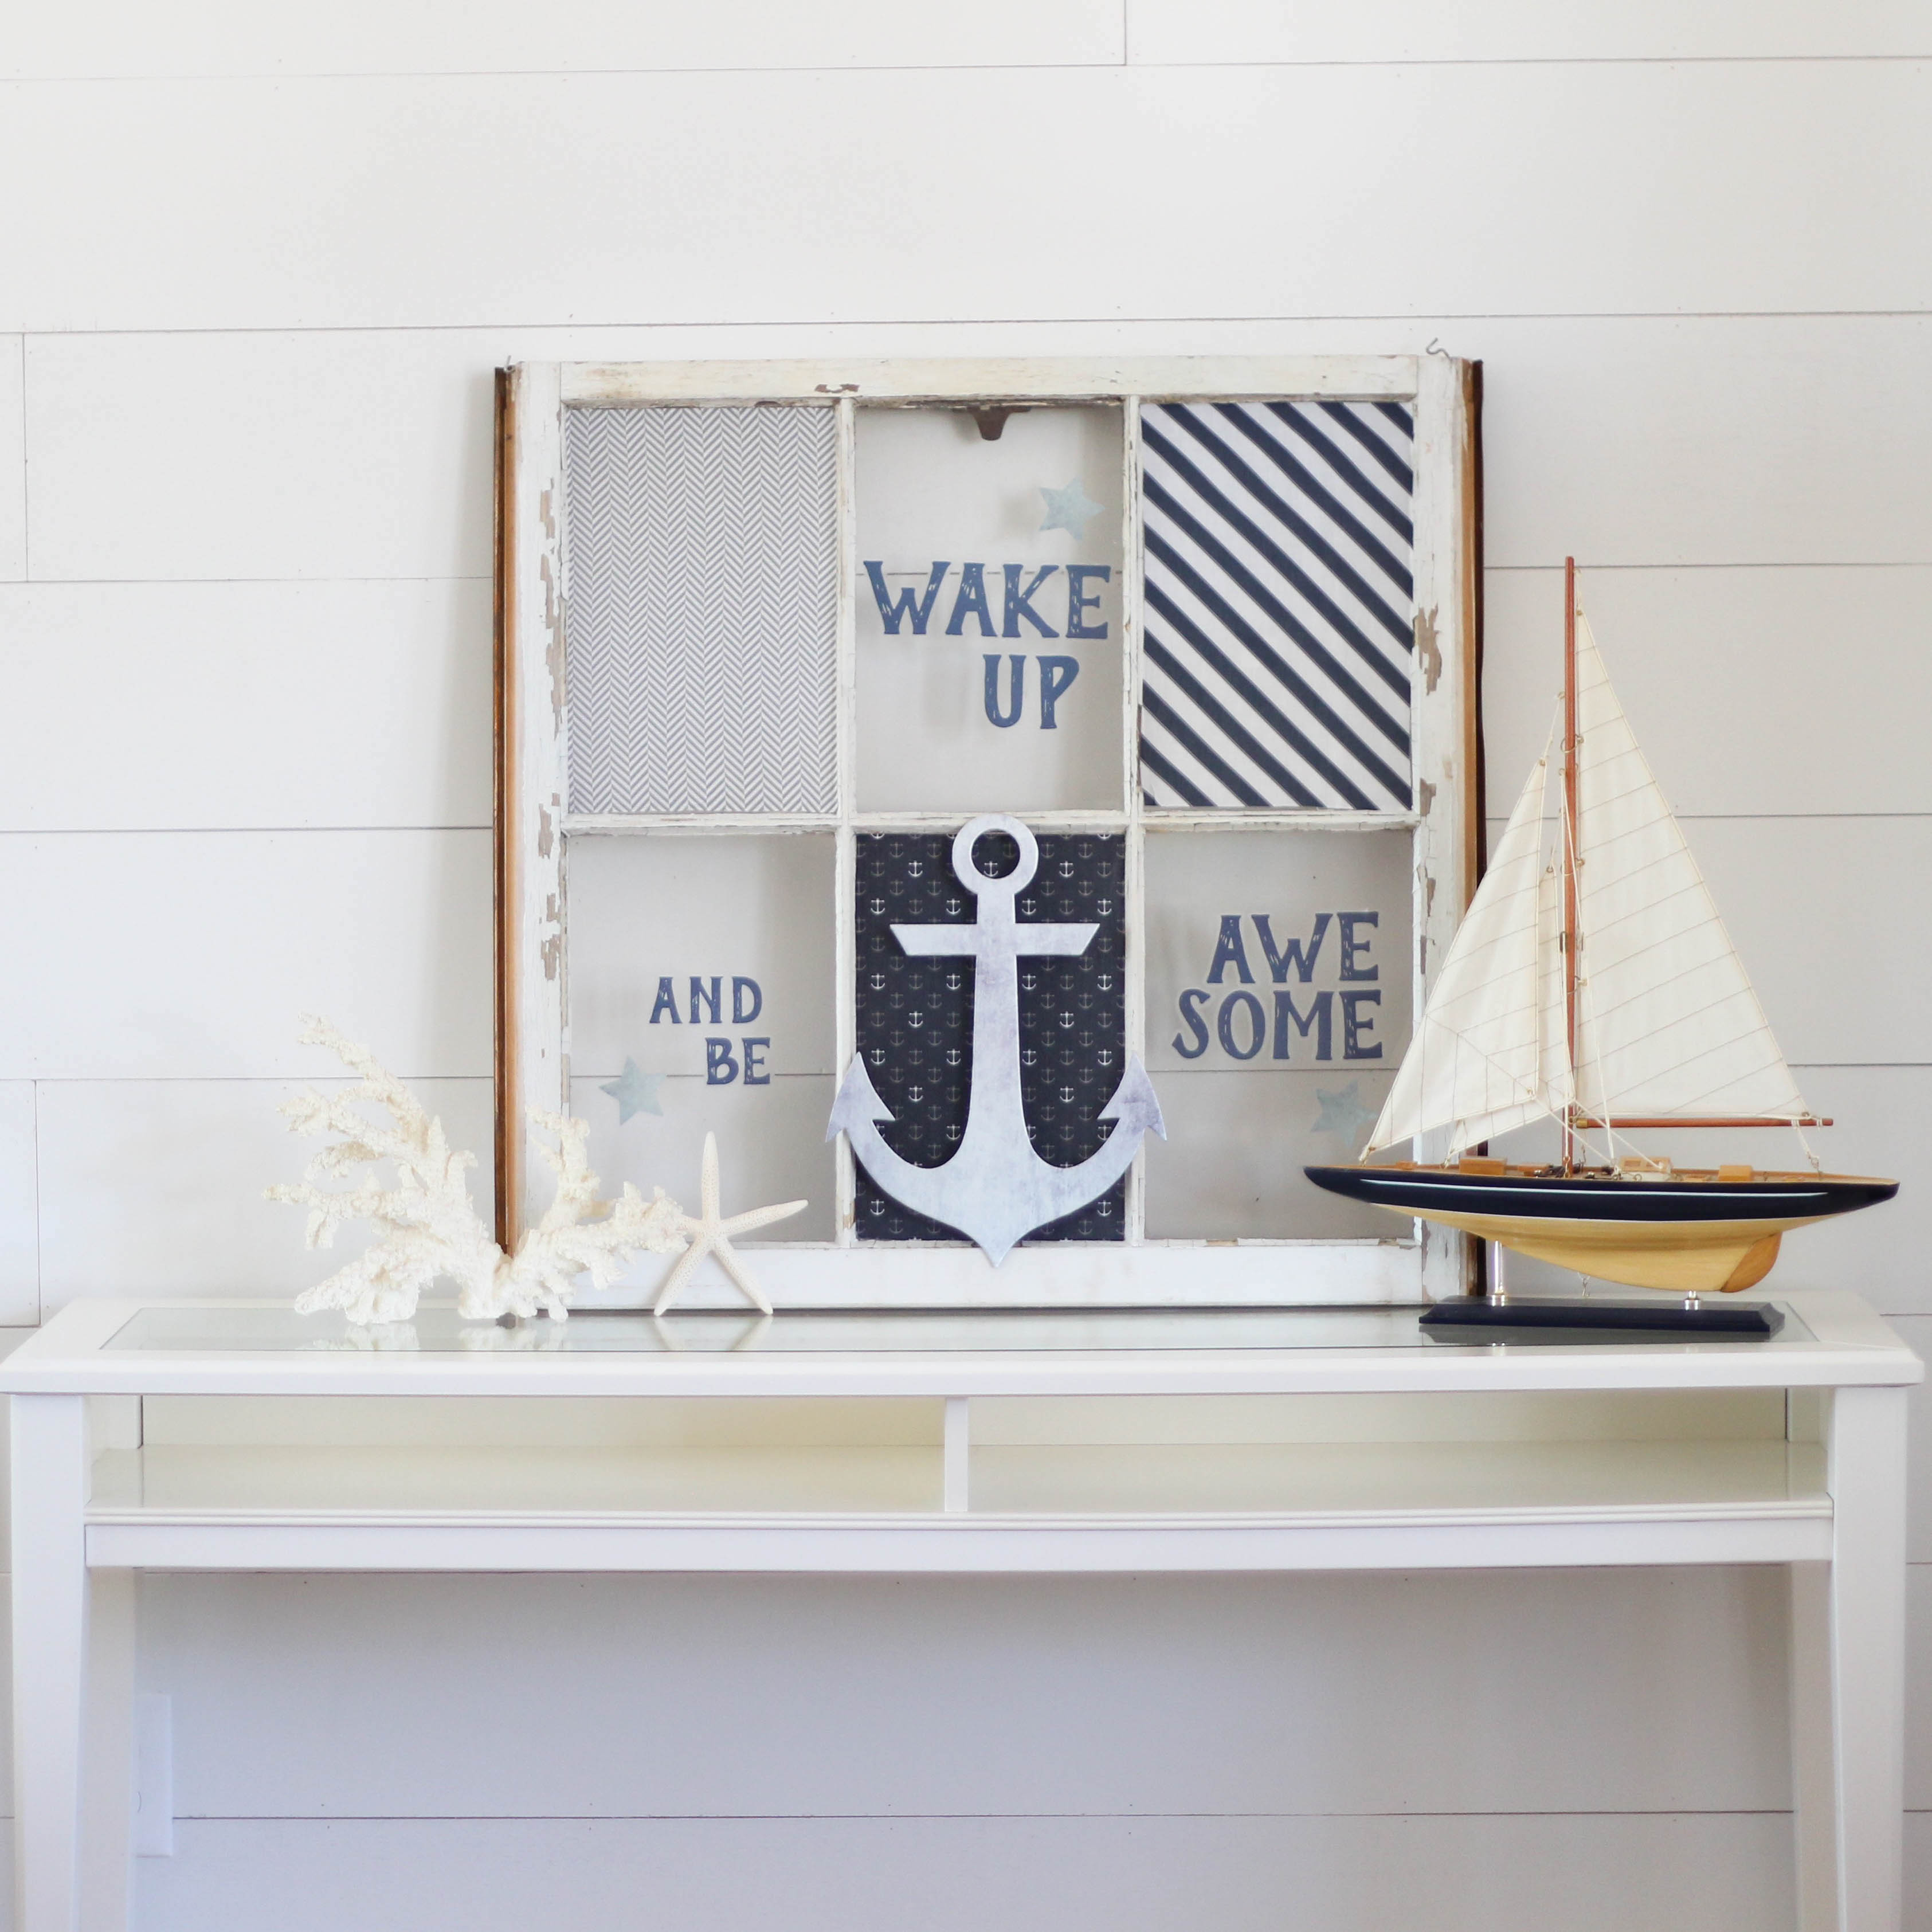
In case you haven’t noticed, I’ve got a thing for old windows. Usually, they can be turned into the coolest pieces of home decor on the planet. And this project is no exception. Wouldn’t it be sweet displayed snugly on the wall in a nursery? Kiddo’s bedroom? Teen’s bedroom?
Supplies you’ll need:
Paper Riot Co. Nautical Dimensional Wall Art Kit
Paper Riot Co. Nautical Patterns Adhesive Fabric
An old window
A scissors
After you’ve prepped your window (read below for tips on selecting & prepping your window for a project), follow these easy peezy instructions:
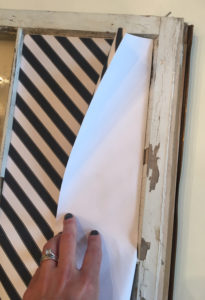 First, you’ll measure and cut fabric pieces. The easiest way to do this is to lay the fabric, still adhered to backing, right into window pane and crease along side edge where it should be cut. Remove fabric and lay onto flat surface, then fold and crease along line to be cut. Cut along folded line with scissors. Place fabric back onto window again, and repeat the above steps to measure and trim along bottom edge of fabric piece.
After measuring and cutting, your piece of material should lay perfectly into window pane opening. If any fabric overlaps the edges, trim away excess as necessary. Peel backing from one edge of fabric and adhere it along the edge of the window. As you peel the remaining backing away from the fabric, smooth the fabric onto the window with your hand.
Repeat with other fabrics for for remaining two panes that are being covered in fabric.
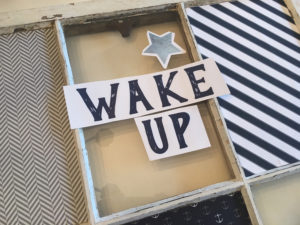 After fabrics have been applied to all three panes, trim words from decal sheet and lay onto panes for placement. You will note that on our window, the letters as placed on the sheet were a tad wider than the window opening. We still placed them there, however we squeezed them together a little closer so they all fit. Each letter is cut individually, so it was easy to space them how we wanted.
Depending on the size of window openings in your window, you may need to get a tad creative in decal placement. You’ll notice we had to hyphenate the word “awesome” on ours. 😉
After all your fabric and decals have been placed, your window project should be complete, and look totally fab. If it’s not, and a decal or fabric needs to be adjusted, no sweat. Just gently peel and reapply.
NOTE: While our fabric can be removed and reapplied, we recommend only doing so immediately after first placement. Fabric stickiness may behave differently once applied to a surface for a long period of time.
Here are some tips for finding the perfect window for your project:
If you find a window in great shape, simply clean the glass and add decals. We were lucky with this one, as that’s all we needed to do. Should you decide that you’d like to update the color of your window or it’s in dire need of a fresh coat of paint, it’s easy! Just lightly sand, paint and seal (we recommend Minwax Polycrylic Sealer or Rustoleum Topcoat) prior to adding decals to the glass. Easy peezy!
 Before you plunk your money down, you’ll definitely want to follow these tips for inspecting windows to make sure you’re getting the most bang for your buck (and to insure that your window won’t self-destruct later):
- Be sure there are no cracks or chips in the glass.
- Be sure the glass is firmly secured (by either metal clips or caulking) to the pane. Note: If you’re ambitious, you can remove the clips or caulking and redo those yourself, but I prefer to purchase them when they’re already in great shape.
- Be sure there are no rotting areas on the wood. This can cause you some big headaches down the road. The window could fall apart, shift or just crumble.
- As you’re choosing your window, consider the size and shape of the glass openings. If you have a specific project in mind, you’ll want to be sure the design you’ll be adding will sit nicely in the openings.
Happy window decorating. Be warned: it’s a tad bit addictive! 🙂