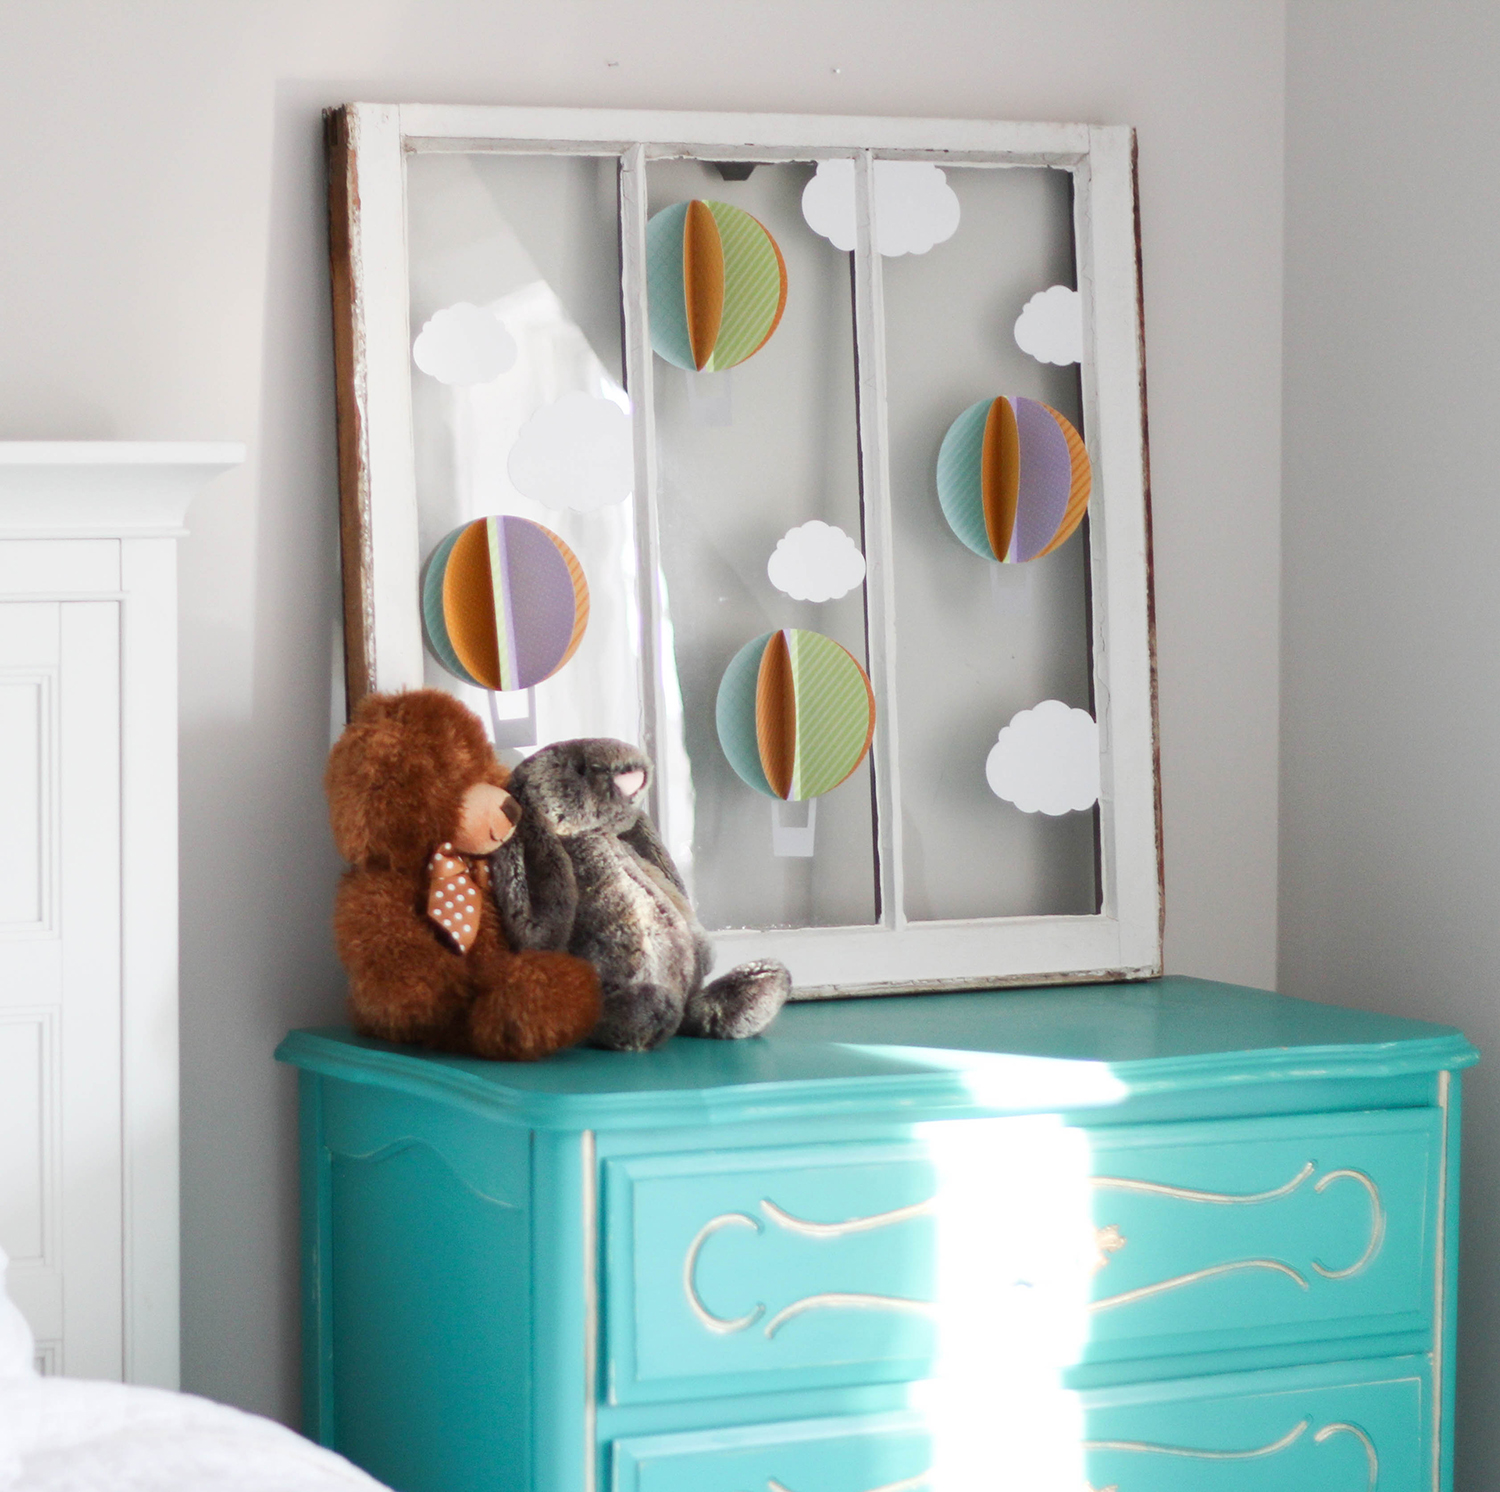
Aaah, old windows. Some of the coolest DIY projects in home decor start out as a discarded, old window. And what treasures they are. With just a little cleaning, perhaps some fresh paint (or not if you’re going for a true rustic look) and a few fun decals, you can have a sweet piece of home decor you’ll love.
Just look at these cute little dudes. They’re loving every minute of hanging out next to the coolest DIY nursery decor on the planet.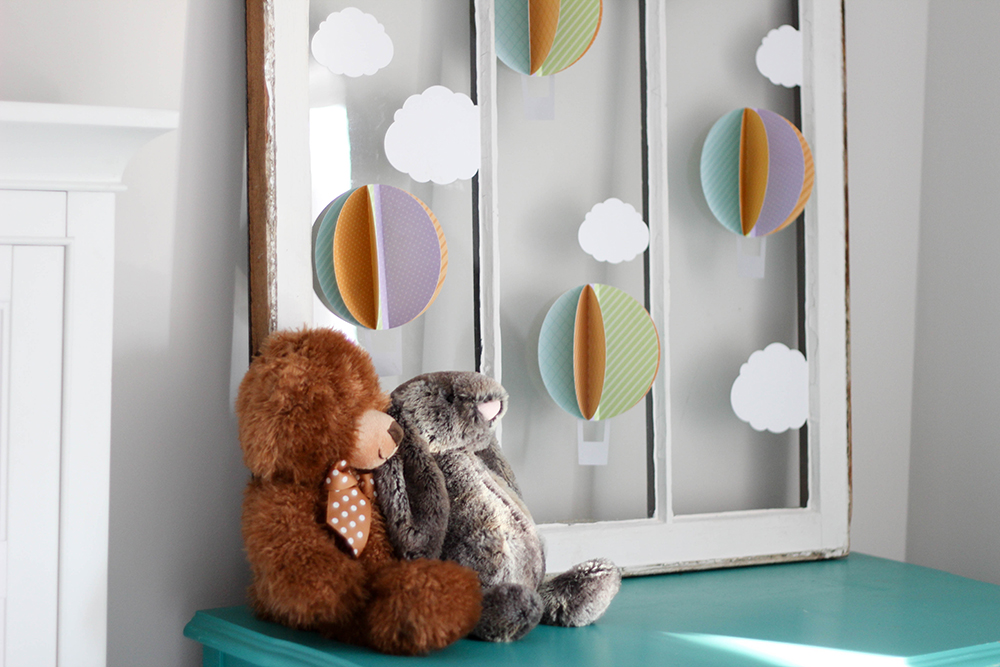
Supplies you’ll need:
Paper Riot Co. Up in the Clouds Dimensional Wall Decals
An old window
Window cleaner & paper towels
Optional: Sandpaper, paint, paint brush & sealer
After you’ve prepped your window (read below for tips on selecting & prepping your window for a project), simply peel and stick the balloon and cloud decals onto your window. NOTE: for some added fun, we trimmed away a small section from one side of a few decals and placed them along the edge of the window. This will give the appearance that they’re floating behind the window frame. FUN!
Here are some tips for finding the perfect window for your project:
If you find a window in great shape, simply clean the glass and add decals. We were lucky with this one, as that’s all we needed to do. Should you decide that you’d like to update the color of your window or it’s in dire need of a fresh coat of paint, it’s easy! Just lightly sand, paint and seal (we recommend Minwax Polycrylic Sealer or Rustoleum Topcoat) prior to adding decals to the glass. Easy peezy!
 Before you plunk your money down, you’ll definitely want to follow these tips for inspecting windows to make sure you’re getting the most bang for your buck (and to insure that your window won’t self-destruct later):
- Be sure there are no cracks or chips in the glass.
- Be sure the glass is firmly secured (by either metal clips or caulking) to the pane. Note: If you’re ambitious, you can remove the clips or caulking and redo those yourself, but I prefer to purchase them when they’re already in great shape.
- Be sure there are no rotting areas on the wood. This can cause you some big headaches down the road. The window could fall apart, shift or just crumble.
- As you’re choosing your window, consider the size and shape of the glass openings. If you have a specific project in mind, you’ll want to be sure the design you’ll be adding will sit nicely in the openings.
Happy window decorating. Be warned: it’s a tad bit addictive! 🙂